Adding a music player widget

This tutorial assumes that you have an understanding of the customiser and how to edit widget settings. If you aren’t yet familiar with these steps, we recommend reading the following articles before continuing:
In this article we will be taking a look at the music player widget and related settings to add audio tracks to your website.
- Add the widget to your page
From within the customiser, navigate to Edit Layout > [Page name] Body and click on Add Widget. From the list of widgets, scroll down to select Music Player. This will add the default music player to the bottom of your page – note, you can drag widgets from the side panel to whatever order you wish.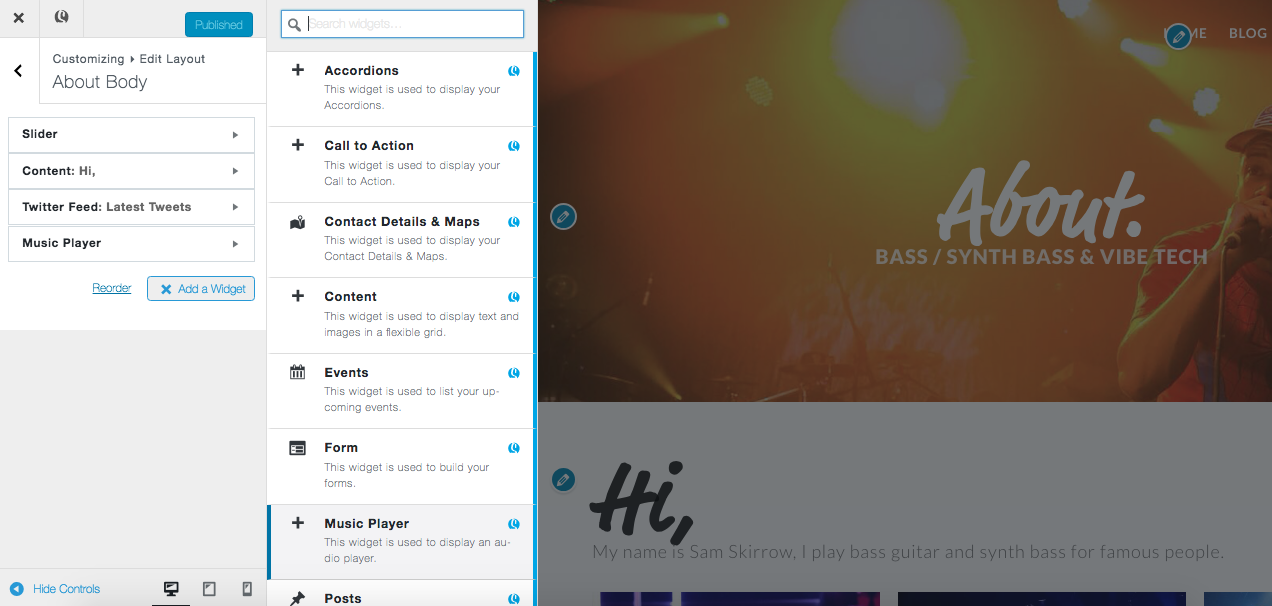
- Basic track settings
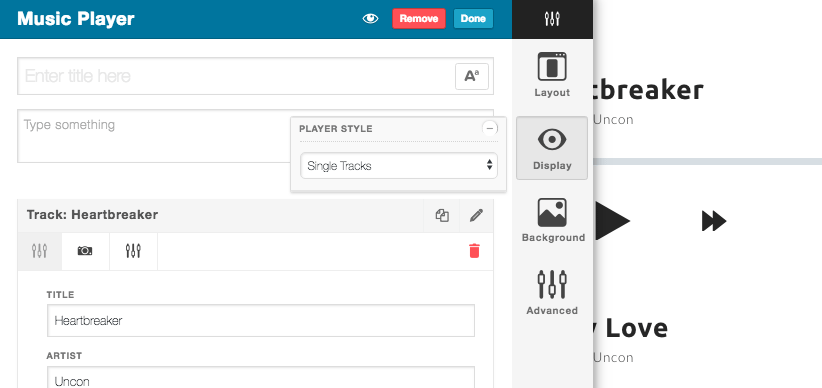
Give your track a title, an author and click on Upload MP3 to add your track. Please note, only MP3 format will work within the music player widget.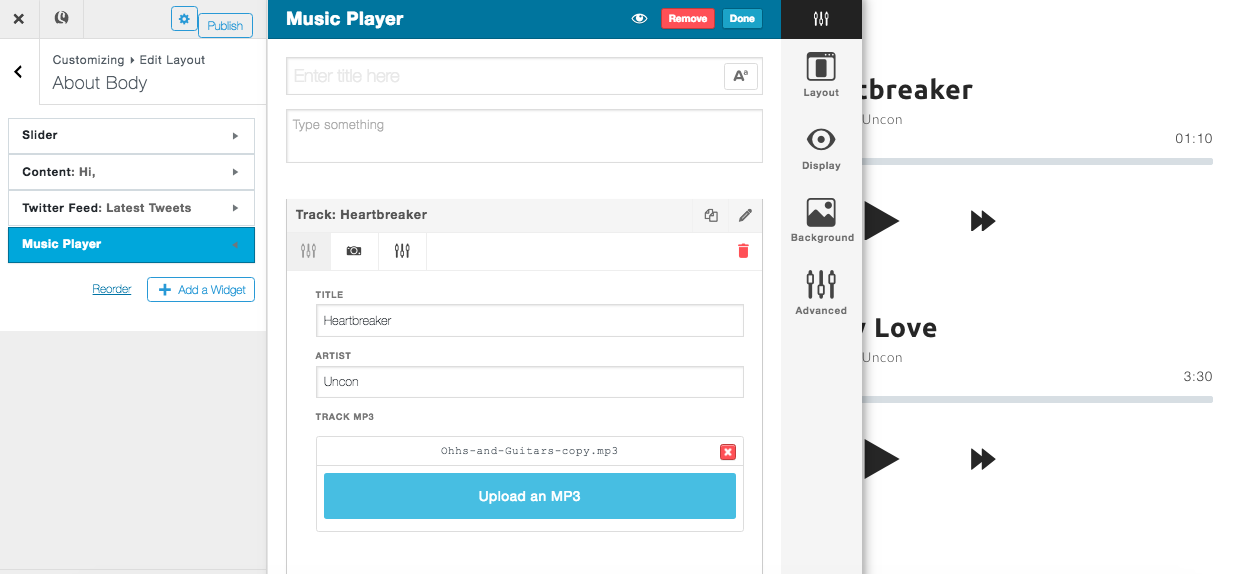
- Add album artwork
Adding album art is the same as adding a featured image to a column inside a content widget. Click on Featured Image and upload the image you intend to use as your album artwork. We recommend a minimum width of 1000px and a ratio of 1:1 (i.e. a square image!).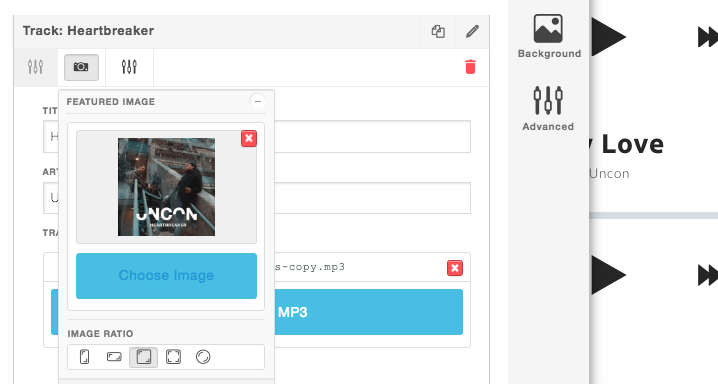
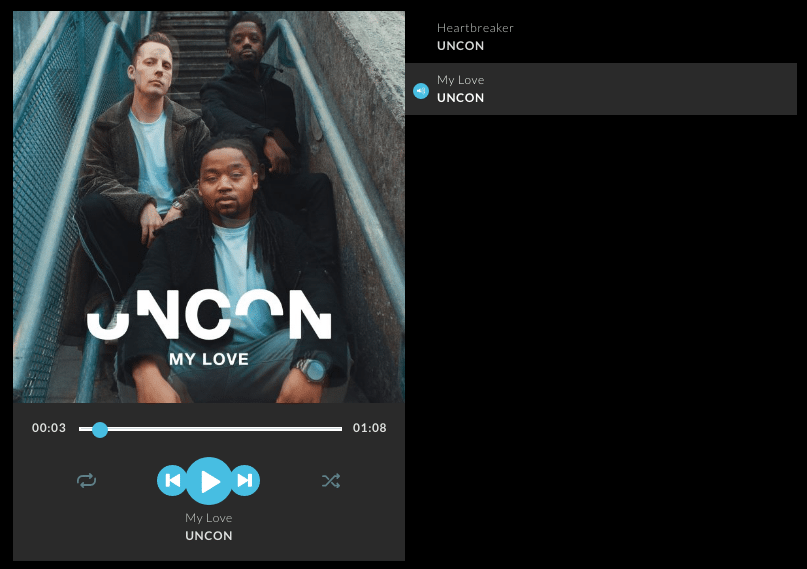
- Pick your layout style
On the right hand side of the widget settings panel you’ll find display options. Here you can chose from a drop down of either single track display or playlist display. Below you can see what each display type looks like: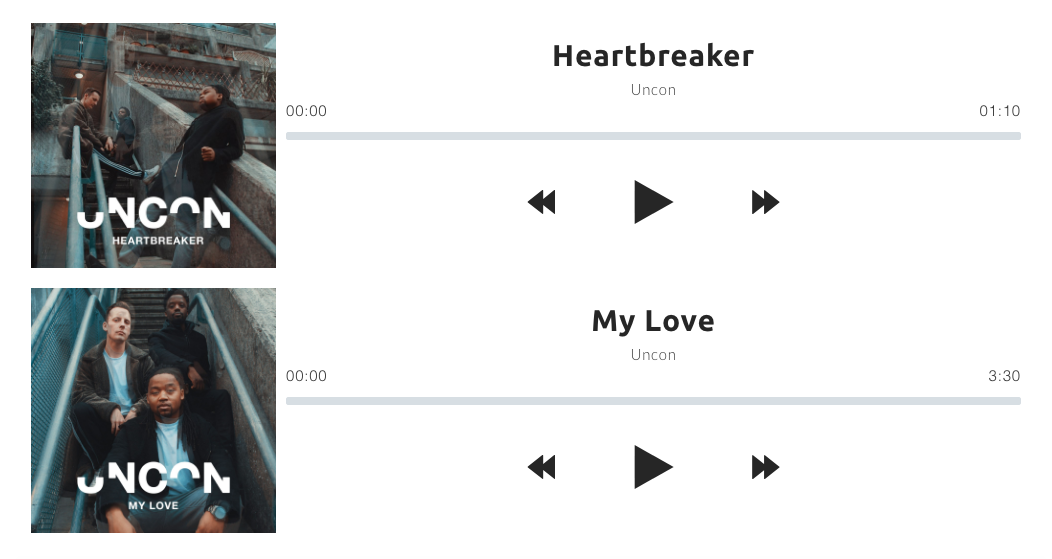
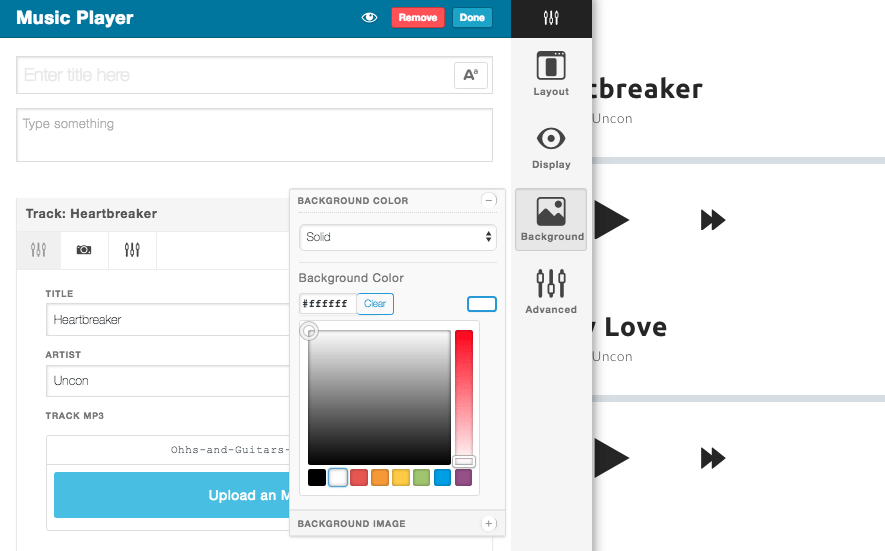
- The Skizzar music player widget will automatically detect your background colour and switch from a light skin to a dark skin. To change the background colour, simply select Background from the widget design settings on the right and select your colour preference. Selecting a dark background will result in a darker theme like below